52 Weeks of Historical How-To’s, Week 46: How to Make Paper Models
For this week’s blog I thought I’d have a go at paper modelling, as we have in our Copyright Deposit Collection a little work published in 1824 entitled Papyro-plastics, or the art of modelling in paper, translated from the German of Bernard Heinrich Blasche (a professor at the Seminary of Schnepfenthal) by David Boileau. The term ‘papyro-plastics’ for paper modelling is explained in the preface:
as the art of making cork models of architectural monuments on a small scale, has obtained on the continent the appellation of Phelloplastics, from the Greek word Φελλος, cork; we think ourselves warranted by this analogy in denominating the art of modelling in paper Papyro-plastics.

The work itself was intended as an instructive amusement for children, with the object of introducing them to the most common and practical applications of geometry and fostering an ardour for mathematics through the conversion of quadrangles and parallelograms into objects such as tables, houses, bridges, and ships.
In addition to teaching manual dexterity, giving a knowledge of proportions, and a taste for the arts of design, paper modelling would also afford “a salutary antidote to that listless indolence, that pernicious love of cards, or that rage of reading any book at random, which are unfortunately tolerated in many respectable families”.

The idea of combining education and entertainment for children was not a new phenomenon in the 19th century, but had been advocated as early as 1693 by John Locke in his Some thoughts concerning education.
Our copy of Papyro Plastics is the first edition, but a second edition followed one year later in 1825, the first edition having sold out in a few months. The second edition was enlarged, improved, and corrected, and “Many of the flat paper figures having been found rather incorrect upon trial, they have all been redrawn”. This wasn’t boding well for my attempts, but nothing loath, I set about the task.
The work itself is set out methodically. It begins with preliminary requisites and directions, describing how the drawing is undertaken (with a pair of compasses, brass ruler, and ruler in the shape of a triangle), the cutting (with scissors or penknife), the folding (where particular attention should be paid to ensure in a straight line), the joining (using glue, gum arabic, paste, or wafers – sadly not the edible kind, but ones which were converted in to a kind of paste when properly wetted), the thickness of glue (to be like the white of an egg), the painting (to be performed in the usual way with brushes of an appropriate size to the cut paper), the thickness of the paper (it should be strong, stiff, and very smooth), before ending with the directive that “objects ought not to be represented on too large or on too small a scale.”

So, armed with the materials which I would need (I opted for the scissors, and have to confess to using a plastic ruler, and a colouring pencil rather paint), I then proceeded to follow the forty exercises in drawing with compasses and ruler. These begin with the simple “To draw a right or straight line”, moving through “To place the length of a given line exactly in the middle of another line”, to the more complicated “To make four Lines meet at their Extremities”.
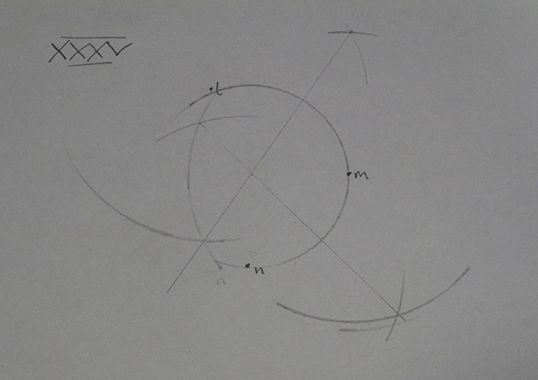
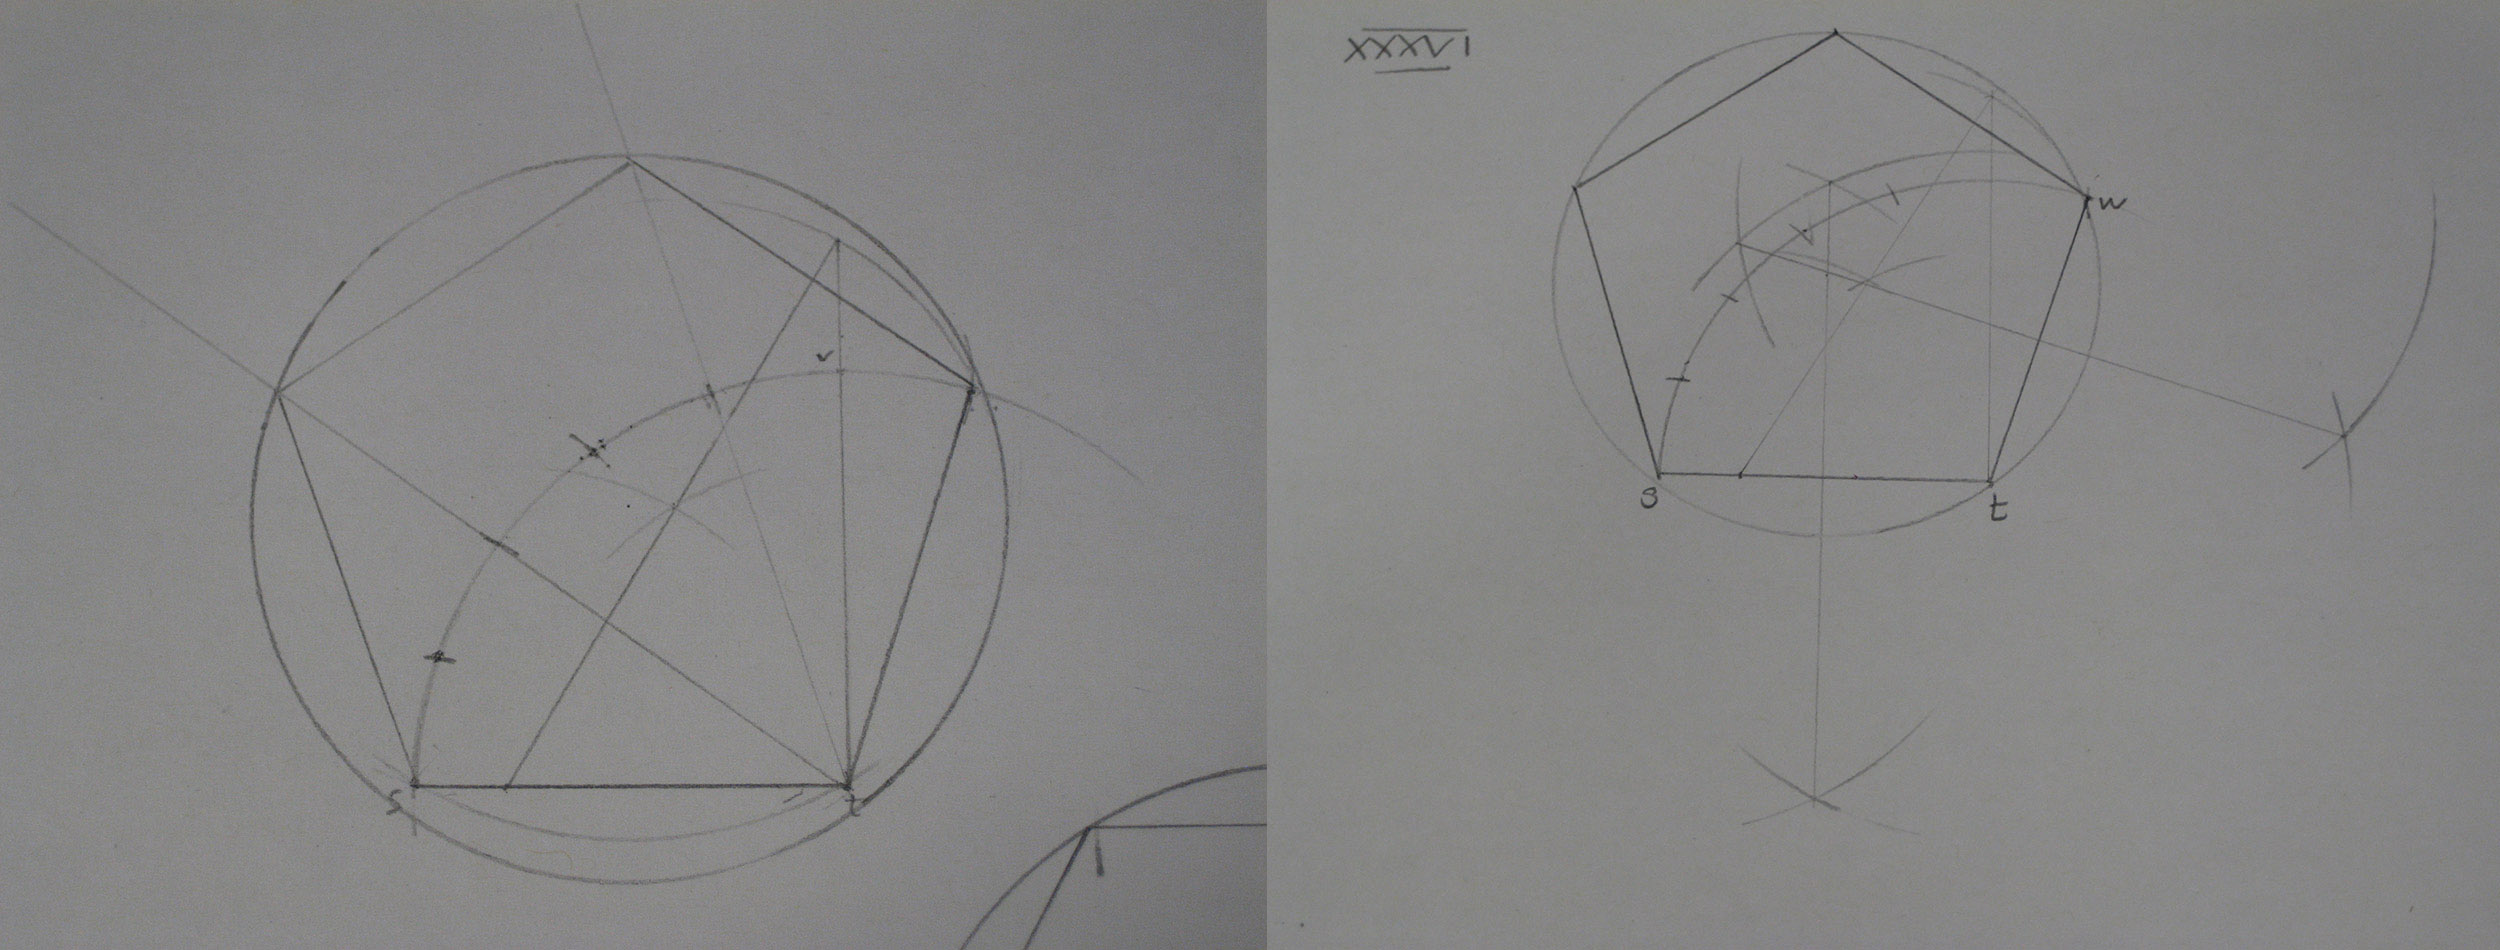
It is important to follow these through in sequence, otherwise instructions in later articles don’t make sense – I accidentally skipped exercise 35 (“To draw a circular Arch through three given Points which are not in a straight line”), which meant that when following the directions for drawing a regular polygon (exercise 36), I was somewhat stumped when told to “seek in s t and w for a point on which to rest the end of the compasses in order to describe the curve line which goes through the points s, t, w […]” – the very action which is described in exercise 35!
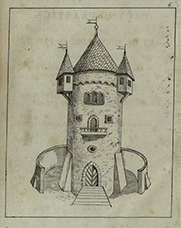
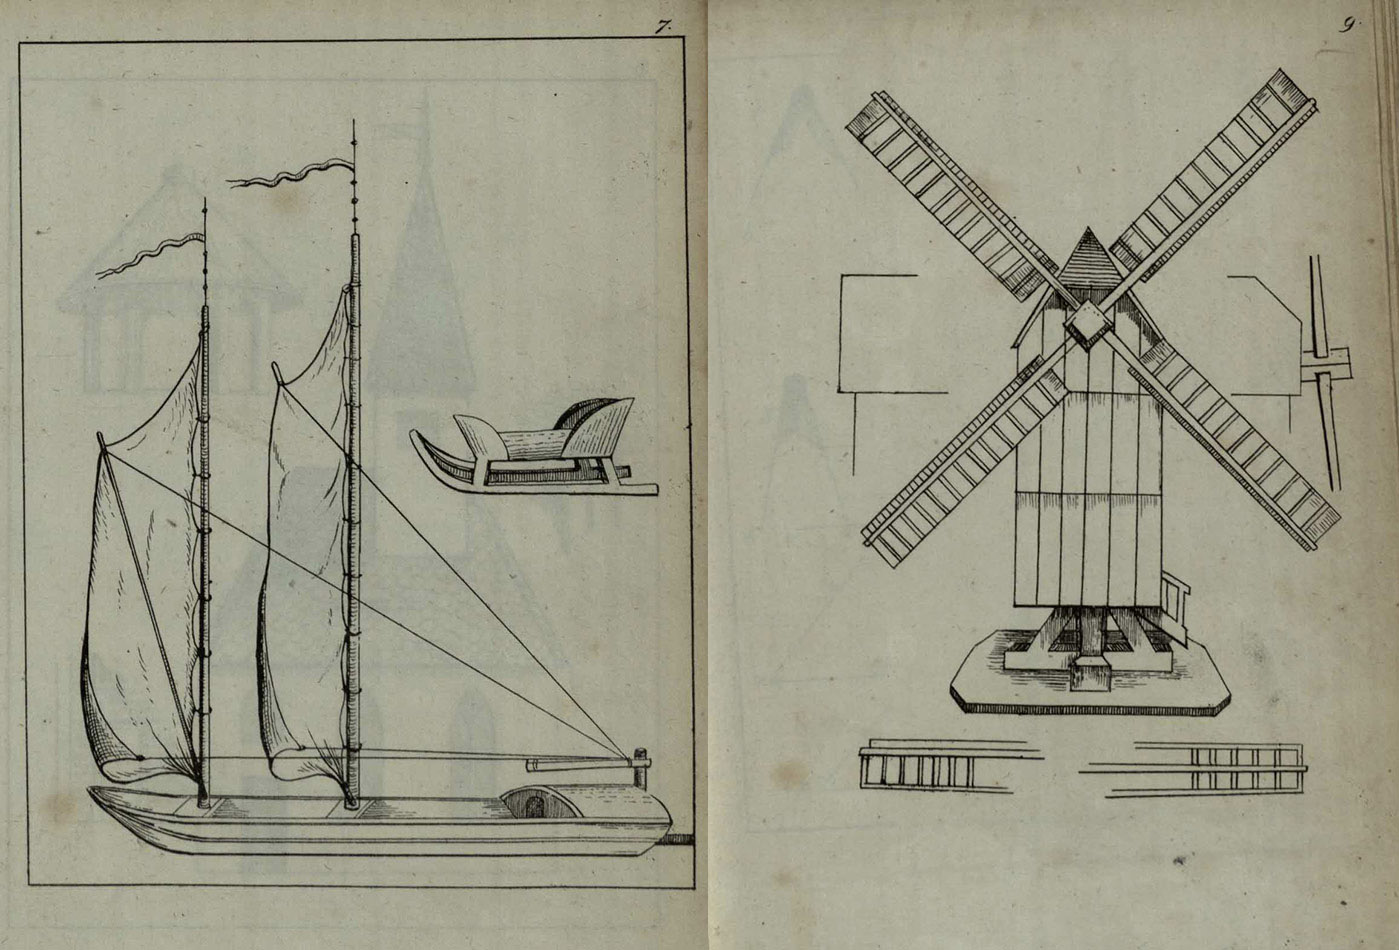
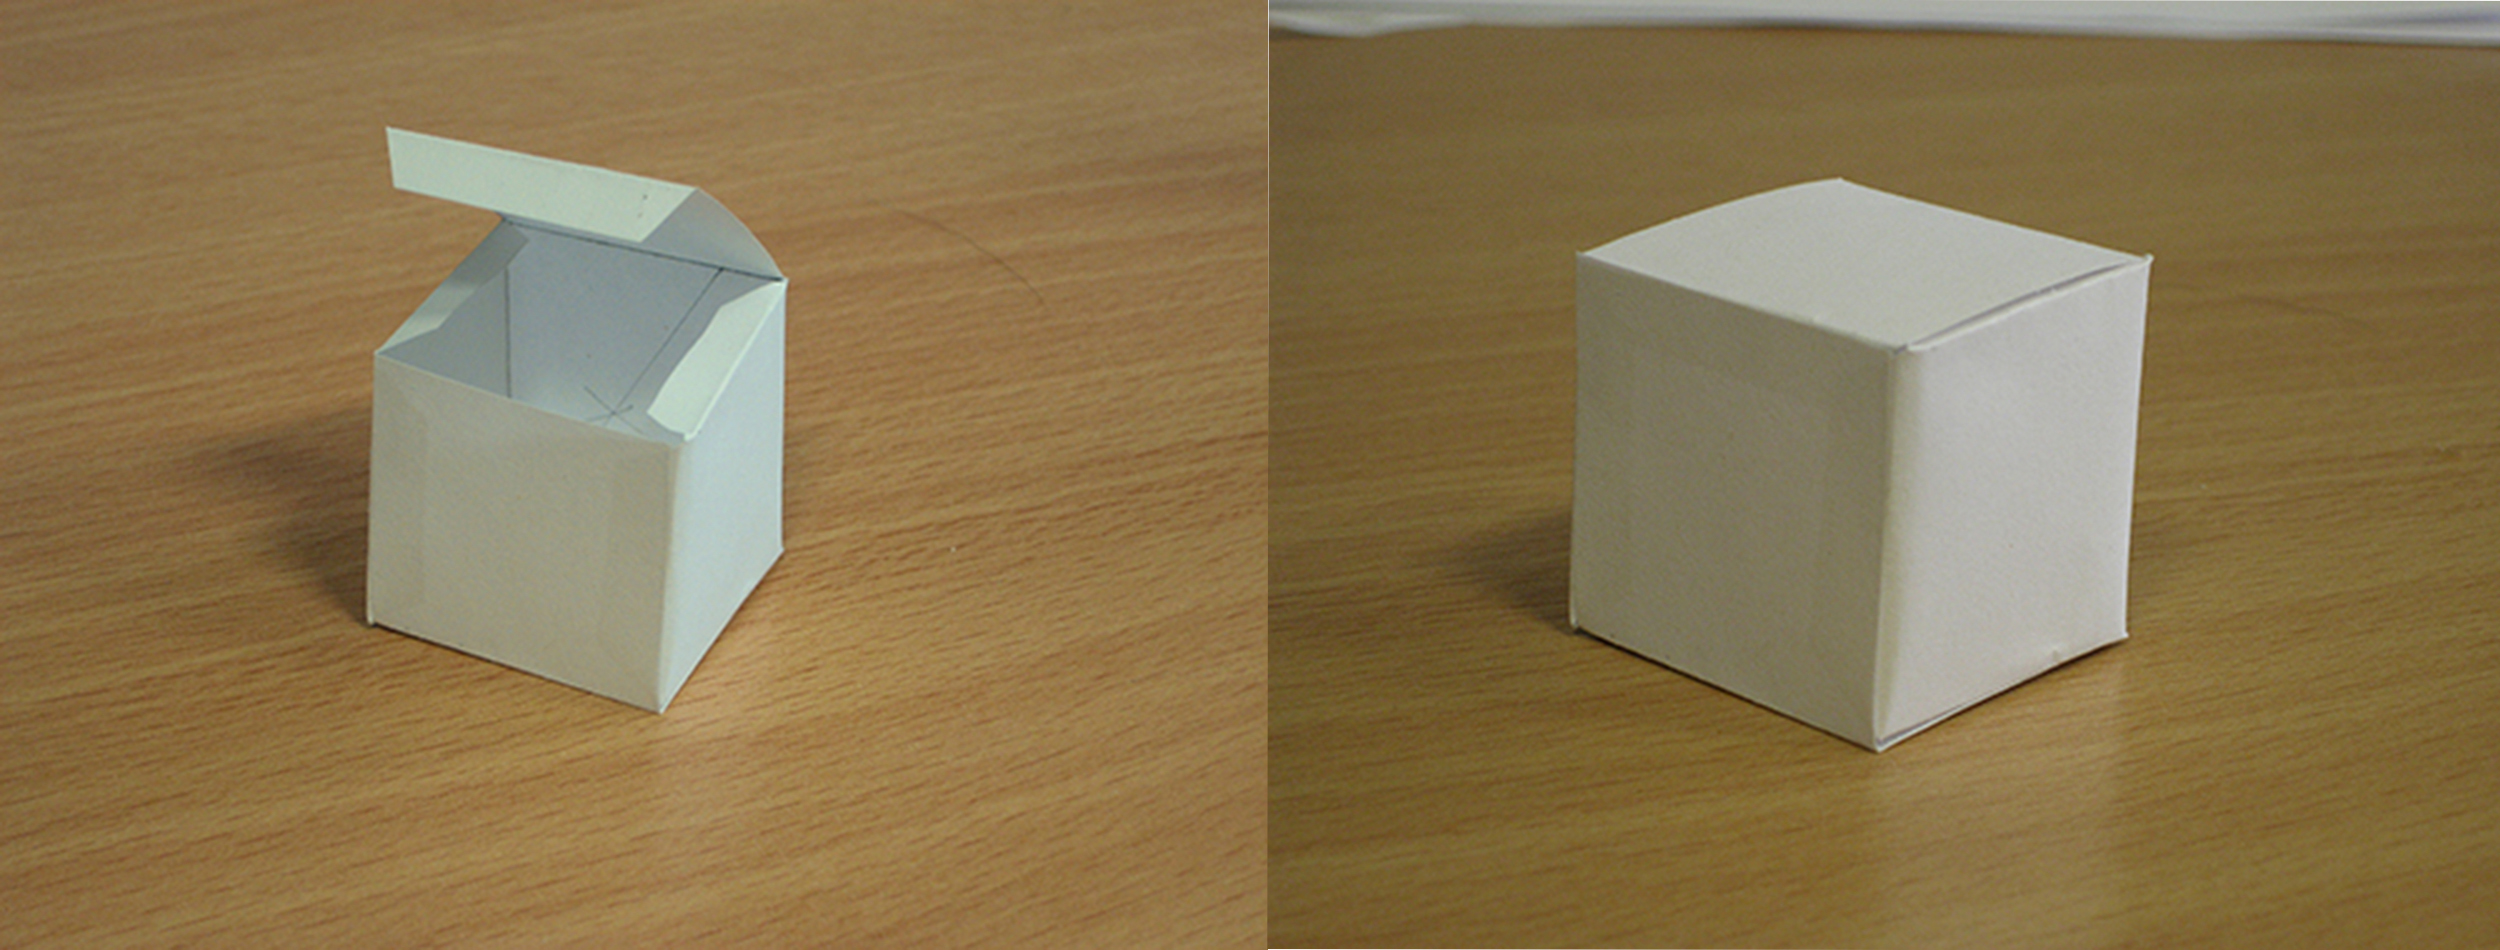
The idea is that you progress through each of exercises before attempting to make any of the models. Then, rather than turning to the model which you find most interesting (I like the sound of the Ancient Tower, or perhaps the Windmill), you should progress through each model in order, as they are arranged in complexity from easiest to hardest. So I restrained myself, and started at the beginning, with the first item being a die.
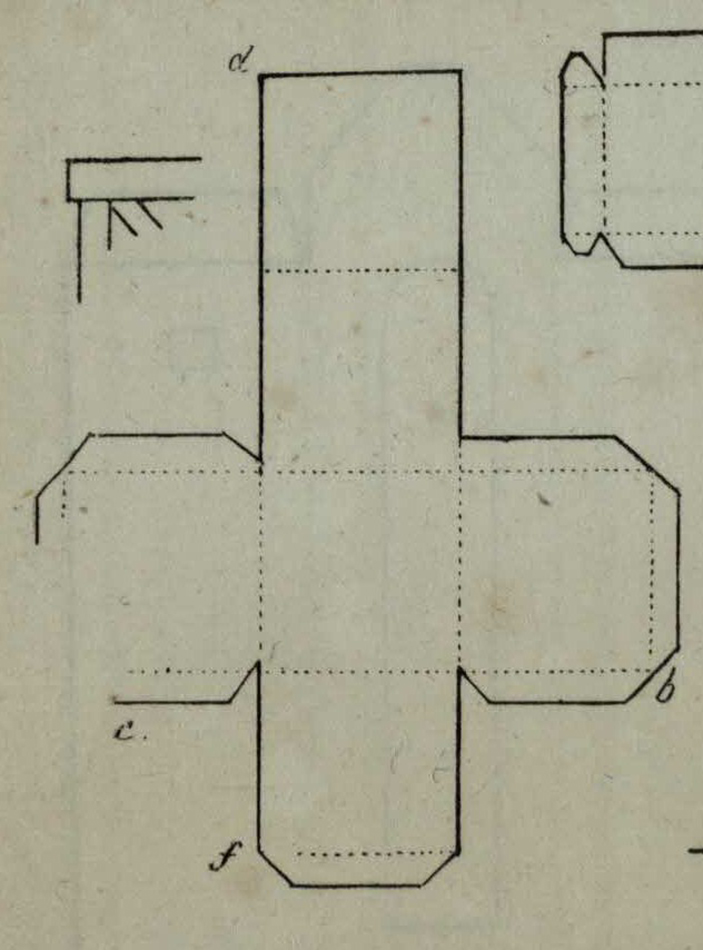
This seemed very straight forward, consisting of squares joined together, and is probably something which I attempted at primary school many moons ago.
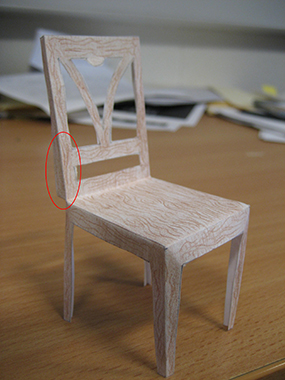
I then had a go at making the chair, the second item. I have to admit that I had two attempts at this. The first time I was somewhat bamboozled by the instructions, and, being impatient, I just tried to copy the template on Plate 12.
Unsurprisingly, my chair didn’t turn out quite the same. I hadn’t realised that the lower fretwork in the back was where the fold for the seat was intended, and as such I wasn’t quite sure what I was supped to be doing with the flaps at either side of the back.
I then decided to follow the advice of the author:
should you not succeed at once, be not deterred; try once more with greater attention, seek for the cause of your failure, and avoid the mistake into which you had been betrayed. Repeated attempts are sure to be crowned with success.
My cause of failure was not to follow the instructions! So, going back for a second attempt I tried to get all the proportions correct – for instance, the depth of the seat was one fifth its length, the tops of the legs one sixth of their height, and so on.
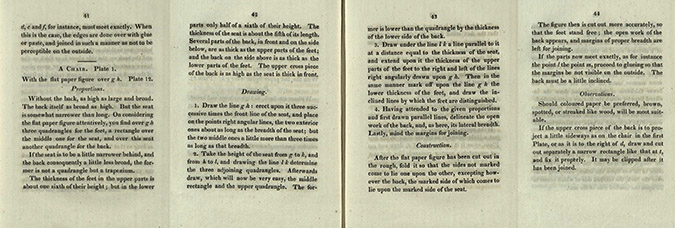
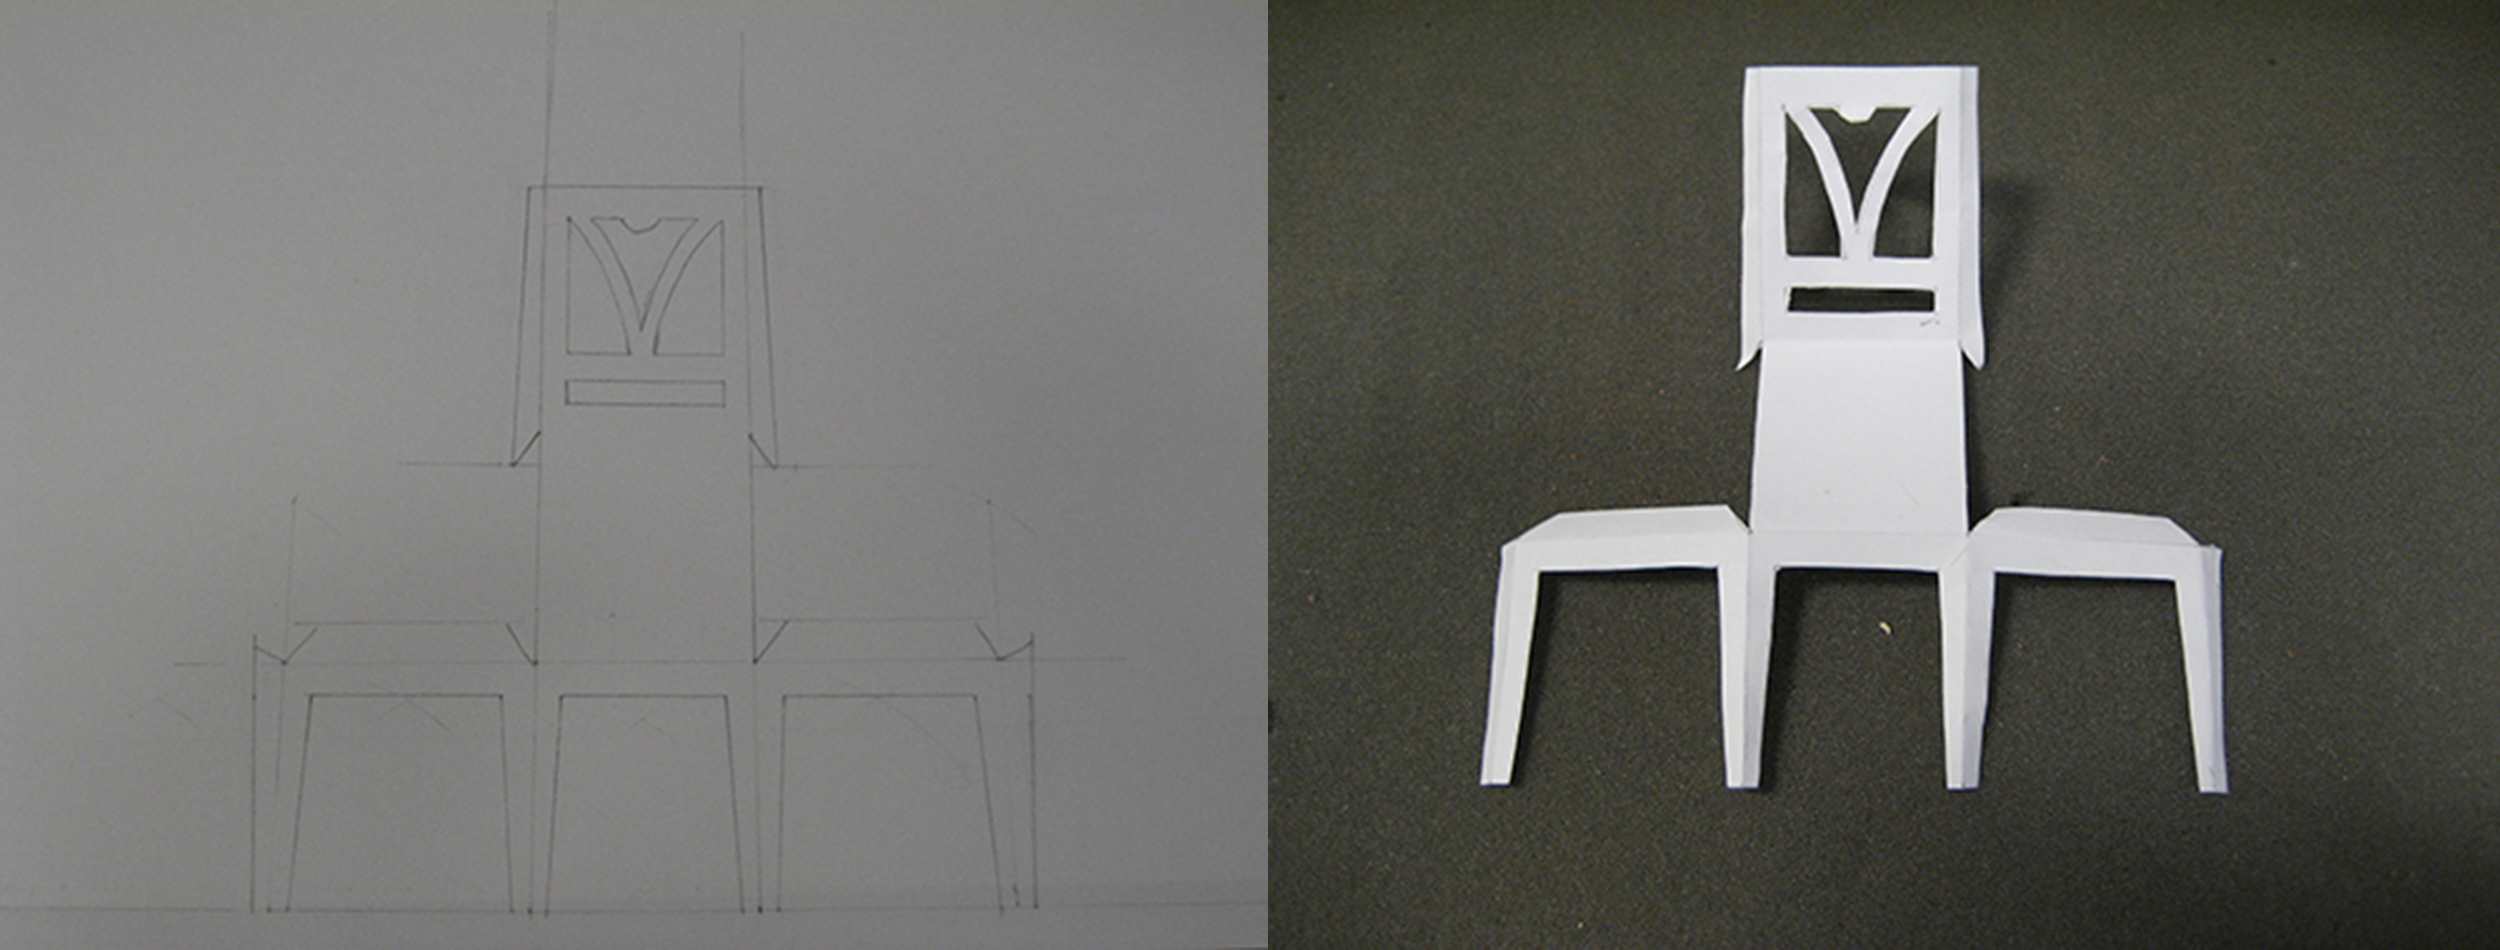
I also realised, whilst looking at my previous attempt, that the sides of the back were probably supposed to be in line with the back legs (hence my previous confusion about the ‘flaps’) – and indeed, the instructions make this clear: “If the parts now meet exactly, as for instance the point l the point m, proceed to glueing” [see the template below]. I still wasn’t sure about the proportions between the width and depth of the seat (“the seat is somewhat narrower than long”), so I again based my judgement upon the template on Table 12.
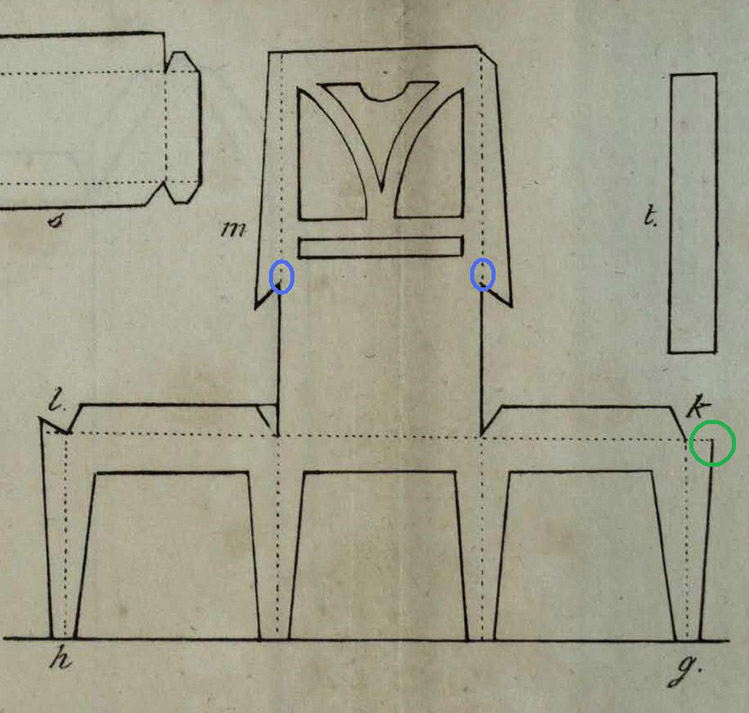
Everything seemed to be going much more smoothly this time, although my fears regarding the errors in the first edition appear to have been founded, for it wasn’t clear from the template that the two dotted lines for the back not only had to be folded, but also cut up to the base of the first piece of fretwork in order for everything to line up; and there is no border drawn on for sticking the back right leg in place.
Observant readers of the instructions may have noticed that there is a final piece to the chair, which I didn’t attach – a rectangle to go across the top of the back of the chair. This was simply due to the fact that I wasn’t sure how this piece fitted, and so decided not to meddle with my model. But it also seems to be an optional addition, the description starting “If”.
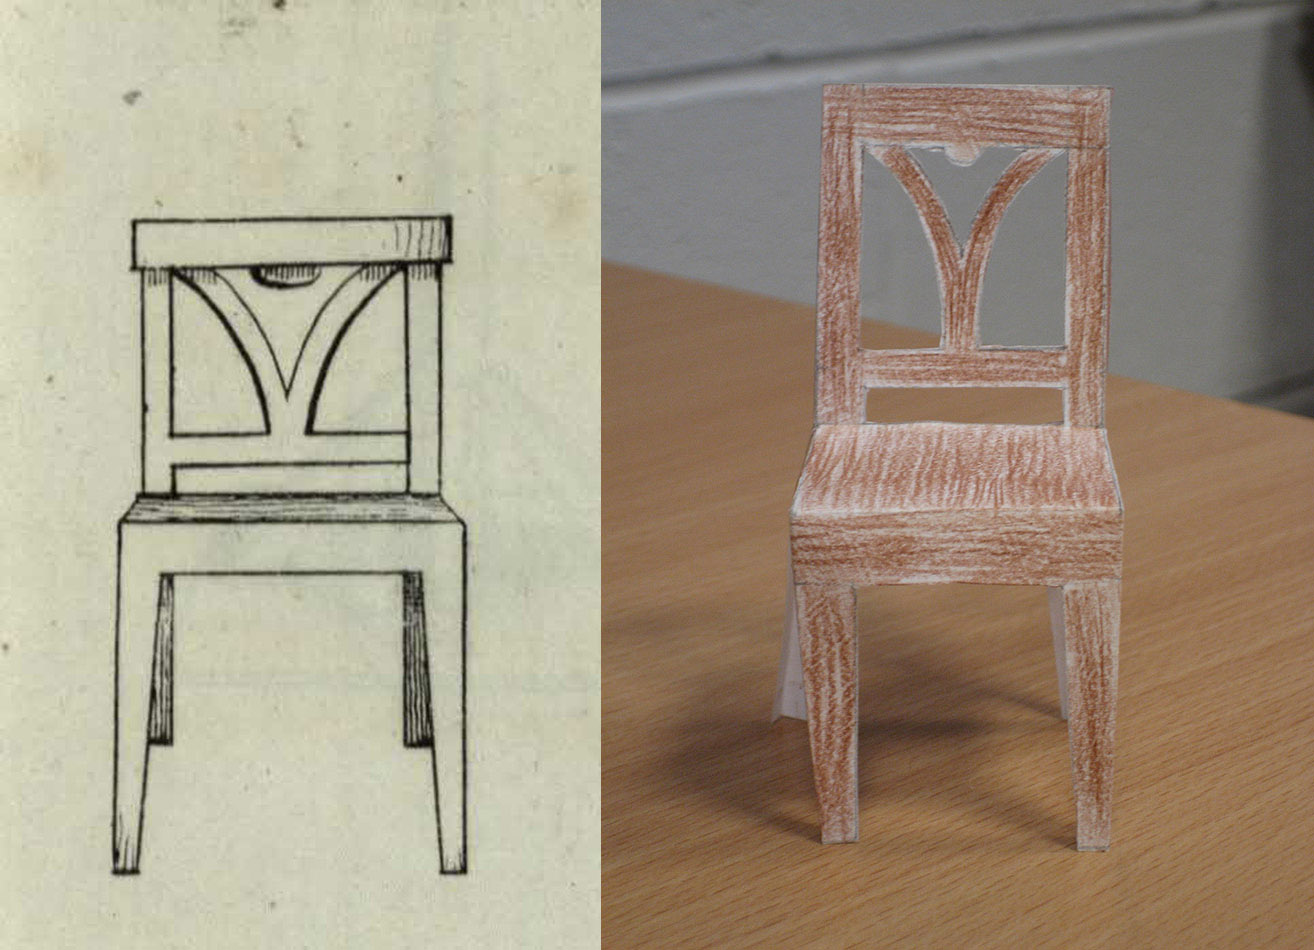
The finished product now more closely resembles that in the book (or so I think). Whether this repeated attempt was a crowned success, I shall leave that for others to decide!
B.A.
Lovely! Now, will you be tackling the tower next ...? (You Rare Books people are my heroes; I have high expectations of you!)
Glad you liked it. I had no immediate plans to tackle the tower, but if our readers call for it, then who am I to say nay! I can't promise it'll be soon, but I'm game to give it a go....
[…] […]